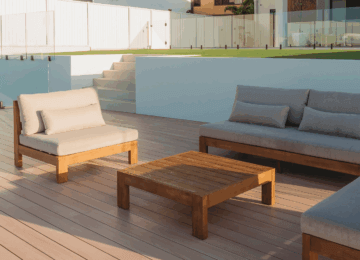


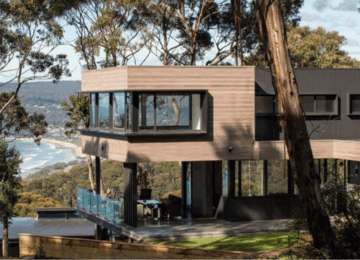
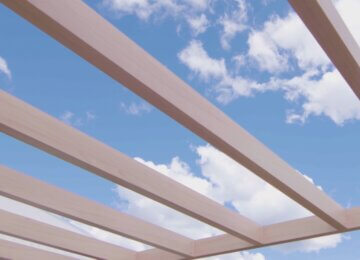


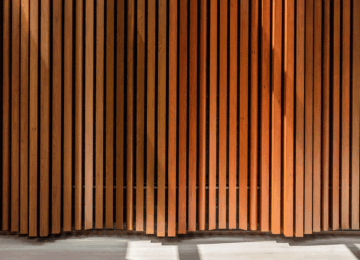
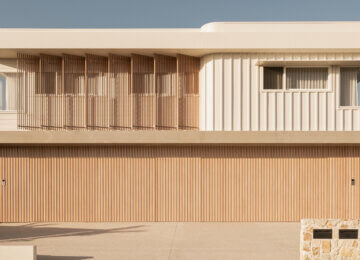
Designed for Australian conditions, DecoDeck® combines the natural beauty of timber decking with the strength and durability of aluminium. The following installation guide outlines a range of installation techniques. If you require further assistance, please contact us.
WARNING:
Care and Personal Protective Equipment (PPE) should be worn at all times when handling DecoDeck® products. Failure to do so risks potential serious injury, disablement or death. Simultaneously, ensure workspace is clean and free from dust, sawdust, metal fines and/or shavings. Processing of the decking boards in areas with excessive dust, sawdust, metal dines and/or shavings risks potential damage to the finished surface.
BAL 40/ BAL FZ Decking:
In order to comply with the requirements of the BAL 40/ BAL FZ rating, the gap between decking boards must be enclosed. DECO provides cover strips to enclose the deck. Without cover strips, DecoDeck® can be used in BAL 29 areas.
Note: Decking cover strips are required to be slid in from an open end. To do this, the deck must be installed with the boards running out from a wall with a free end.
Important Information
All DecoDeck® boards and accessories are supplied in 6.5m lengths. As part of the manufacturing process, the first 10mm of both ends of the extrusion are taped and not imaged, therefore each decking board will need to be trimmed by 15mm on each end to remove the tape and provide a clean finish. After the removal of each end, the useable length is 6.45m.
Decking Boards
Two profiles are available in DecoDeck, 94mm and 134mm. With a variety of install applications available, reach out to a DECO representative for more information and support.
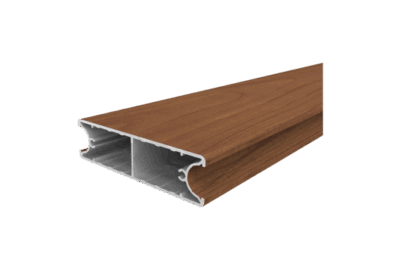
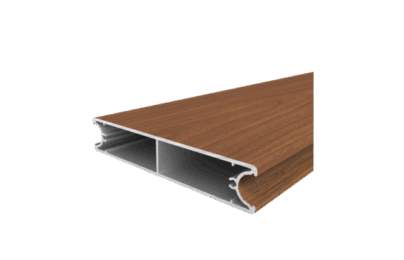
Decking Board Wide

DK102 - Deck Fixing Connector
Deco Fixing Connector Connects and fixes between decking boards.
ANG3220 - 32x20mm Angle
Angles are sued to cover the ripped boards, or the side/ edges of the decking boards as a finishing option. (Optional)
DK103 - Wall Starting Connector
Wall Starting Connector allows the decking system to start to a wall/ building.
DKCH - 32x25mm Channel
Channel is one of the options for finishing the edge of the decking boards. (Optional)
DK114 - 1.25x30mm Fixing Screws - Metal
1.25 x 30mm Self tapping square drive metal screws.
DK104 - 2.6x40.3mm Fixing Screws - Wood
2.6 x 40.3mm Square drive wood screws.
DKIJC - Deck Joiner
Deck Joiner joins decking boards end to end for a seamless finish, while at the same time creating a strong structure for the decking (powder coated in black).
DK106 - Cover Strip
Cover Strips are designed for two purposes: for covering the edge of the decking or for installation between decking boards, covering the gap and allowing the deck to be compliant with requirements for BAL- 40/ BAL- FZ (Flame Zone). Deco can colour match cover strips.
DK107 - 2x75mm Square Drive Bit
2 x 75mm square drive bit with a narrow shaft. It is highly recommended this bit be used to avoid scuffing the boards which can be caused by other bits.
PR01 - Pop Rivet
Colour matched pop rivets provide an aesthetic finish fora channel or angle.All testing has been done using the detail provided in this installation guide and in order to claim the performances set out here within, the detail in this guide must be followed.
AS1530.1
Methods for fire tests on building materials, components and structures – Combustibility test for materials.
AS 1530.3
Methods for fire tests on building materials, components and structures – Simultaneous determination of ignitability, flame propagation, heat release and smoke release.
AS 3837-G1
Method of test for heat and smoke release rates for materials and products using an oxygen consumption calorimeter.
NCC COMPLIANT – NON-COMBUSTIBLE
Volume 1 – Clause C.1.12 – Combustibility of Materials (No Amendment in NCC 2016). (CSIRO)
AS 3715
Performance testing for thermoset powder coatings applied to aluminium intended for exterior architectural applications.
AS 3959-FZ
Methods for testing bushfire safety – (BAL) requirements of building in a bushfire prone area .
AS 4586:P4
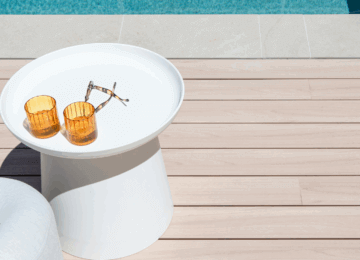
Methods of test for slip resistance – Suitability for swimming pool surrounds. DecoDeck achieves a P4/R11 Slip Rating.
Screw/ Rivet
Metal Support- Colour Matched Pop Rivets or Self Drilling TEK Screws
Wood Support- Counter Sunk Screws with Stem Caps
Sealant/ Adhesive
Deco recommends the use of high-quality sealant and adhesives.
Impact Driver
A high-quality Impact Driver with an appropriate driver bit is recommended for fixing all extrusions to the building structure.
Mitre Saw
A high-quality Mitre Saw equipped with an aluminium cutting blade is recommended for cutting the boards to length and trimming the boardends.
Table Saw
A high-quality Table Saw is recommended for ripping the final (top) board to the correct dimension for finishing of the installation.
Applications
Structure
Layout
General Install
Additional Details
Fascia Decking Installation
Picture Frame Installation
1

Structure/ Sub-Framing and Fixing
To ensure the finished deck is stable and safe, all framing should be constructed from a material to ensure compliance with the NCC and relevant standards, and all joists must be located at a maximum of 600mm centres.
Before installing any DecoDeck products, the supporting structure should be assessed to ensure that it is structurally sound and able to support the loads of the DecoDeck products that are to be installed. DECO recommends that users contact a certified Engineer to assess the supporting structure and fixings required when installing DecoDeck, especially in high-risk areas.
1


Determine Decking Layout
Below are two common layouts for your decking system:
Option A – Exposed End
Option B – Enclosed End. Each option involves slightly different installation methods and
different accessories.
Please determine the appropriate option for the installation.
2


Starting Options
Option A involves starting the deck without connecting it to a building. Option B involves attaching the decking board to a building behind it.
Please Note: For Option A, please skip to the Install tab after completing the below.
Option A- Exposed End
1. Determine the correct position for your board.
2. Hold the board in place, using the v-groove as a guideline, and pre-drill the board and the joist.
3. Screw fix the board into place.
| Label | Description |
|---|---|
| A | Wood Fixing Screw (DC-Dk104) Or Metal Fixing Screw (DC-DK114) depending on joist material |
| B | DecoDeck Board |
| C | Joist |
| Label | Description |
|---|---|
| A | Screw |
3


Option B- Enclosed End
When building a deck adjoining a wall, the overall size of the deck should be measured in order to determine the starting location and the number of boards required. Measure the deck dimension (X) and divide it by 100 or 140 (depending on the board width that has been selected) to determine the number of full board widths required. Once you have determined the number of full board widths required, the remaining dimension (Y = X – {No. of full board widths x [100/140]}) can then be addressed by;
1) Using a standard size section (25 x 25, 25 x 30, 25 x 40, 25 x 50 ect.) to ensure that the install finishes with a full board.
OR
2) Using an angle to cover up the ripped board next to the wall.
If the dimension X allows you to fit in an exact number of full boards go to Option B1, otherwise go to Option B2 or B3.
| Label | Description |
|---|---|
| A | Building |
| B | Number of Boards |
| C | Joist |
Option B1
1. Position the Wall Starting Connector by pushing it against the wall and the joist
2. Screw fix it toward the joist from the side.
| Label | Description |
|---|---|
| A | Building |
| B | Wall Starting Connector (DC-DK103) by pushing it against the wall and the joist |
| C | Joist |
Isometric View
Option B2
1. Cut the standard section to length and position it in place
2. Position the angle from bottom and screw fix toward the joist and the section
3. Position the Wall Starting Connector by pushing it against the standard section and the joist
4. Lastly, screw fix the Wall Starting Connector from the side
| Label | Description |
|---|---|
| A | Building |
| B | Standard Section |
| C | Attach standard section with angle and screws before starting to lay the decking boards |
| D | Last Board |
| E | Joist |
Bottom View
Option B3
1. Rip the board into length according to dimension Y
2. Rip the board shorter on top and screw fix the bottom section. (see DETAIL B3)
3. Apply adhesive and position the angle in desired location
4. Give constant pressure downward until adhesive is set.
| Label | Description |
|---|---|
| A | Building |
| B | Rip the board shorter on top to allow screw fixing of bottom section |
| C | Last Board |
| D | Joist |
Isometric View
1

First Board
Cut DecoDeck board to required length and clip the first board to DC-DK103 Wall Starting Connector.
Please Note: May require light tapping with rubber mallet to install.
| Label | Description |
|---|---|
| A | Building |
| B | Joist |
2

Pre-Fix Decking Board
Attach DC-DK102 Decking Fixing Connectors to the joist. Loosely fix into the joist.
(This allows minor adjustment on the overall position at the end of the installation process.)
| Label | Description |
|---|---|
| A | Building |
| B | Wood Fixing Screw (DC-DK104) or Metal Fixing Screw (DC-DK114) depending on joist material |
3

Install Additional DecoDeck Boards
Repeat Steps 2 to 3 until required decking boards are installed.
| Label | Description |
|---|---|
| A | Building |
| B | Loosely fixed screws |
| C | Joist |
4


Finish the Decking Board
For an open end finish, pre-drill Ø2.5mm at approximately 45 degrees into the Decking Board using the v-groove as a guide and fix the screw through the hole into the joist.
Slide in DC-DK106 Cover strip to the edge of the decking boards(See DETAIL A).
Lastly, tighten off all the screws after all the decking boards have been adjusted into position (such as evenly spaced etc).
| Label | Description |
|---|---|
| A | Slide Cover Strip in from end of the board |
1


Decking Edge Finishing Options
DECO offers three ways to finish DecoDeck Boards. All components can be colour matched to your Decking Board.
End Caps: Press fit the end caps to the end of the decking boards; light tapping with rubber mallet may be required.
Channel: Position the channel to the correct location, using colour matched pop rivet to fix at the top / bottom or screw fix from the bottom of the boards. (depending on application).
Angle: Position the angle to the correct location, using colour matched pop rivets to fix it at the top of the angle.
End Cap (DC-DK105/205)
| Label | Description |
|---|---|
| A | Rubber Mallet |
| B | Endcap |
| C | Joist |
Channel 32mm x 25mm x 3mm (DC-DKCH)
| Label | Description |
|---|---|
| A | Rivet from top |
| B | Screw fix or Rivet from bottom |
| C | Joist |
Angle 32mm x 20mm x 1.6mm (DC-ANG3220)
| Label | Description |
|---|---|
| A | Rivet from top |
| B | Joist |
2


Flame Zone- Cover Strip Installation
Flame Zone-Rated Deck
When building in a BAL 40 / BAL FZ area, the gaps between your decking boards will need to be closed with a cover strip. Slide a Cover Strip into the gap between the decking boards over the top of decking connectors (use a small screw driver to lift the Cover Strip over the connectors if necessary).
Please Note: DC-DK106 Cover Strip can only be installed by sliding in from the edge of the decking before installing the end caps/finish.
| Label | Description |
|---|---|
| A | Cover Strip (DC-DK106) |
| B | Joist |
| Label | Description |
|---|---|
| A | Cover Strip (DC-DK106) |
| Label | Description |
|---|---|
| A | Slide Cover Strip in from the end of the board |
3


Overhang Effect
An overhang effect can be easily achieved by using an angle fixing at the bottom of the decking at the edge. To create an overhang effect, screw fix the angle into position, and screw fix the decking board from below. (see DETAIL A)
| Label | Description |
|---|---|
| A | Screw Fix Decking board from the bottom |
| B | Decking Board |
| C | Angle |
| D | Not greater than 30mm |
| E | Joist |
| Label | Description |
|---|---|
| A | Angle |
4


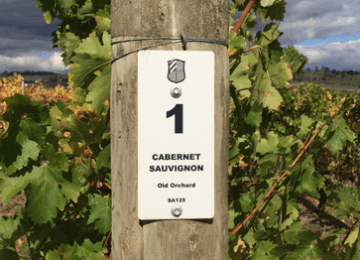
Notching Decking Around Post
DecoDeck boards can be fitted around different shaped posts and structures. Measure and mark the dimension/shape of the post/structure on the decking board, then trim cut the marked area. Position the decking board and install.
| Label | Description |
|---|---|
| A | Trim cut the Decking Board into desired shape |
| Label | Description |
|---|---|
| A | There is no need to leave any gap between the post and the board |
5


End To End Deck Joiner
The Deck Joiner connects two separate Decking Boards with a flush, tight and clean surface finish. The deck joiner can be applied anywhere along the span of the deck without the support of a joist. This allows you to maximise the use of the materials and minimise the wastage, and unlike real timber, the aluminium deck joiner can also minimise the separation of boards after installation. The deck joiner can be used with all DecoDeck boards and should be installed 150 mm deep inside both boards (see SIDE & ISOMETRIC VIEW).
| Label | Description |
|---|---|
| A | 94mm Decking Board (DC-DK101) |
| B | Deck Joiner (PC-DKIJC) |
| C | Metal Fixing Screws (DC-DK114) |
| Label | Description |
|---|---|
| A | Side View |
| Label | Description |
|---|---|
| A | Metal Fixing Screw (DC-DK114) |
6


Achieving Different Corner Styles
Herringbone Pattern
An attractive way to join the Decking Boards at a corner is to use a ‘herringbone’ pattern rather than mitre cutting the boards.
| Label | Description |
|---|---|
| A | Herringbone Pattern |
Mitre Joins
When using mitre joins it is possible to join the 2 boards together by drilling through the screw flute according to the calculation (see DETAIL A).
Please Note: This only works with a 90 degree mitre join.
| Label | Description |
|---|---|
| A | Metal Fixing Screws |
| Label | Description |
|---|---|
| A | Metal Fixing Screws |
Side View
1


Option 1- Fascia Decking
Fix Fascia Decking
Before installing the decking, measure, cut and fix decking board so that it overhangs the supporting structure by 25mm on the side edge. Secure the decking through the opposite end and into the supporting structure using screws, ensuring that the spacing between screws does not exceed 600mm centers.
| Label | Description |
|---|---|
| A | Screw |
| B | Decking Board |
Side View
Ensure that the decking board overhangs the supporting structure by 25mm. This overhand allows the horizontal decking to sit flush on top with the fascia.
Install Cover Strips and Endcaps
After installing the decking, complete the finish by installing the necessary final components. This includes cover strips for the fascia decking boards and end caps/angles for the exposed ends.
| Label | Description |
|---|---|
| A | Slide in Cover Strip |
| B | Endcap |
2


Option 2- Overhung Fascia Decking
Fix Fascia Decking
Before installing, measure and cut decking boards to wrap seamlessly around the structure’s perimeter. Secure the decking through the opposite end and into the supporting structure using screws, ensuring that the spacing between screws does not exceed 600mm centers. Ensure the fascia’s top edge aligns flush with the support structure to allow decking installation over it.
| Label | Description |
|---|---|
| A | Screw |
| B | Decking Board |
Side View
When cutting horizontal Decking Boards, account for the necessary overhang to cover the fascia and the thickness of the End Cap or Angle to keep the sides flush. (End Cap/Angle = 2mm Thickness)
Install Cover Strips and Endcaps
After installing the decking, complete the finish by installing the necessary final components. This includes cover strips for the fascia decking boards and end caps/angles for the exposed ends.
| Label | Description |
|---|---|
| A | Slide in Cover Strip |
| B | Endcap |
| C | 32 x 20 x 1.6 mm Angle |
3


Option 3- Picture Frame Fascia Decking
Fix Fascia Decking
Before installation, measure and cut the decking boards to ensure they fit seamlessly around the structure’s perimeter. To allow for a picture frame finish, add 25mm to the length of each decking board. Mitre the ends of the fascia board at 45 degrees to create a smooth, continuous wrap.
| Label | Description |
|---|---|
| A | Cutting Line |
| B | Decking Board |
| Label | Description |
|---|---|
| A | Cutting Line |
| B | Decking Board |
Fix Fascia Decking
Secure the decking through the opposite end and into the supporting structure using screws, ensuring that the spacing between screws does not exceed 600mm centers. Ensure the fascia’s top edge aligns flush with the support structure to allow decking installation over it.
| Label | Description |
|---|---|
| A | Screw |
| B | Decking Board |
Side View
Ensure that the decking board overhangs the supporting structure by 25mm. This overhang allows the horizontal decking to sit flush on top with the fascia.
Install Cover Strips and Endcaps
After installing the decking, complete the finish by installing the necessary final components. This includes cover strips for the fascia decking boards and end caps/angles for the exposed ends.
NOTE: For this fascia picture frame application, ensure the cover strips are mitre cut at 45 degrees to align with the mitre cut decking boards.
| Label | Description |
|---|---|
| A | Slide in Cover Strip |
Top View
| Label | Description |
|---|---|
| A | Cover Strip |
1


Determine Positioning of First Board
Begin the deck either overhanging or flush with the ground structure, based on the requirements of the site. For situations with an existing wall flush to the ground structure, align the deck with the structure. When using an overhanging board, ensure the overhang does not exceed 30mm. Refer to page 06 for installing options for the First Board.
Flush
Overhung
2

Measure Length of Deck
Determine the end point of the decking by measuring the number of boards required to cover the ground structure. Record the total distance from the starting point to the endpoint (x) and calculate the number of decking boards needed, including spacing for the decking connectors. Adjust the calculation based on the chosen board width (100 or 140mm). If an overhang is included, ensure it does not exceed 30mm.
3


Measure and Cut Picture Frame Boards
Cut the picture frame boards to match the desired perimeter of the deck. If an overhang is required, include the overhang measurement (overhang × 2) when cutting the boards. For a flush finish, cut the boards to the exact perimeter dimensions. Once all perimeter components are cut, mitre each end at a 45-degree angle to create a picture frame aesthetic.
Top View: Flush
Y = Length of supporting structure
Top View: Overhung
Y = Length of supporting structure + (desired overhang) + (desired overhang)
4

Install Starting Board and One Side
Install the starting board and one side of the deck as shown in the diagram. For guidance on installing the starting board based on specific scenarios, refer to the DecoDeck Installation section on page 06. To install overhanging decking boards, refer to the Overhang Effect section.
5

Measure, Cut and Install Internal Decking Area
Measure and cut the required number of boards to the length of “Z” to fill the internal area of the deck. Ensure the boards are cut accurately to fit snugly within the designated space.
Top View
6

Install Final Board and Remaining Slide
Install the final board and the remaining side of the deck as illustrated in the diagram. For detailed instructions on installing the starting board in various scenarios, consult the DecoDeck Installation section starting on page 06. For guidance on installing overhanging decking boards, refer to the Overhang Effect section.
Top View
7


Final Touches
Once assembled, the decking is mitre joined by predrilling through the board’s side and fixing it into the screw flute with a decking screw. Refer to page 15 (Achieving Different Corner Styles) for a mitre join detail.
After installing the decking, complete the finish by installing the necessary final components. This includes cover strips for the decking boards and end caps/angles for any exposed ends.
NOTE: Mitre cut the cover strips at 45 degrees on the side, not the face, for a seamless picture frame wrap.
| Label | Description |
|---|---|
| A | Detail |
| B | Rubber Mallet |
| C | Cover Strip |
Top View
| Label | Description |
|---|---|
| A | Detail |
| B | Rubber Mallet |
| C | Cover Strip |
| Label | Description |
|---|---|
| A | (Red) Removed Section |